
Product Solutions for Water & Waste Water Industry
All water companies distribute drinking water through their pipeline distribution network. At strategic locations throughout the mains supply network, flow measurements have to be made to give a general overview of supply and demand and in some cases information about water losses through leakage along the pipelines.
Often relatively large pipes of varying pipe materials constitute the backbone of drinking water supply networks. Most of these pipes have been in operation for some considerable time. In some cases flow meters had been installed at the time of the network construction, in others, flow metering had not been considered at all.
Applicable Products
Great Plains Industries

A. G Series Turbine Meter
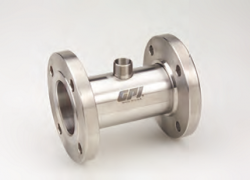
General Specifications:
- Accuracy: +/- 0.5% of reading
- Flow Range: 0.6 to 600 GPM (3.0 to 2,271 L/min)
- Temperature: -450 to 300 deg F [-268 to 426 deg C]
- Pressure: 2,500 to 5,000 PSI (170 to 340 Bar)
- Meter Sizes: 1/2″ to 3” (15 to 80 mm)
- Meter Body Materials: Stainless Steel
- Fitting Connections: NPT, BSP, Sanitary and ANSI Flange
B. G2 Series Turbine Meter
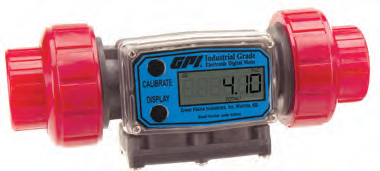
General Specifications:
- Accuracy: +/- 1.5% to 0.75% of reading (Depending on Pipe Size)
- Flow Range: 1.0 to 200 GPM (3.8 to 760 L/min)
- Temperature: -40 to 250 deg F, 140 deg F w/ display [-40 to 121 deg C, 60 deg C w/ display]
- Pressure: 1,500 to 3,000 PSI (102 to 207 Bar)
- Meter Sizes: 1/2″ to 2” (15 to 50 mm)
- Meter Body Materials: Aluminum, Stainless Steel and PVDF
- Fitting Connections: NPT, BSP Thread, Sanitary Flange and True Union
C. TM Turbine Meter
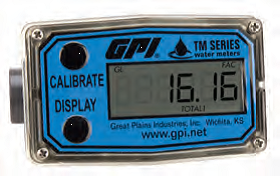
General Specifications:
- Accuracy: +/- 3% of reading
- Flow Range: 10 to 600 GPM (3.8 to 2271 L/min)
- Temperature: 32 to 140 deg F (0 to 60 deg C)
- Pressure: 225 PSI at 73 deg F (15.3 Bar at 23 deg C)
- Meter Sizes: 1/2″ to 4” (15 to 100 mm)
- Meter Body Materials: PVC Plastic
- Fitting Connections: NPT, BSP, #150 ANSI or DIN Flange and Spigot
D. A1 Series Rate & Total Meter
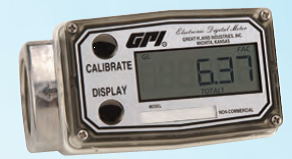
a. MODEL: A025, A100 (1in.)
- Accuracy: +/- 1.5% of reading
- Flow Range GPM (L/min): 0.3-300 (1-190)
- Temperature: -40 to +250 deg F (-40 to +121 deg C)
- Temp. with Computer: 0 to +140 deg F (-18 to +60 deg C)
- Pressure: 300 PSI (21 Bar)
- Meter Sizes: 1″ to 2″ (25 to 50 mm)
- Meter Body Materials: Aluminum and Nylon
- Fitting Connections: NPT and BSP
b. MODEL: A200 (2 in.) N025 & N100 (1 in.)
- Accuracy: +/- 1.5% of reading
- Flow Range GPM (L/min): 0.3-50 (1-190)
- Temperature: -40 to +250 deg F (-40 to +121 deg C)
- Temp. with Computer: 0 to +140 deg F (-18 to +60 deg C)
- Pressure: 150 PSI (10.2 Bar)
- Meter Sizes: 1″ to 2″ (25 to 50 mm)
- Meter Body Materials: Aluminum and Nylon
- Fitting Connections: NPT and BSP
E. Economy Meters
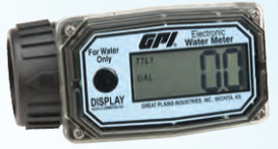
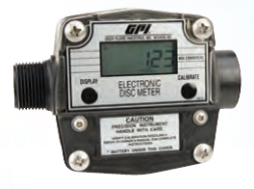
a. MODEL: 01N Turbine
- Accuracy: +/- 5.0% of reading
- Flow Range GPM (L/min): 3-30 (10-100)
- Temperature: 14 to 131 deg F (-10 to 55 deg C)
- Pressure: 150 PSIG (10.2 Bar)
- Meter Sizes: 1″ (25 mm)
- Meter Body Materials: Aluminum, Nylon and PBT Polyester
- Fitting Connections: NPT and BSP
b. MODEL: 01A Turbine
- Accuracy: +/- 5.0% of reading
- Flow Range GPM (L/min): 3-30 (10-100)
- Temperature: 14 to 130 deg F (-10 to 54 deg C)
- Pressure: 300 PSIG (21 Bar)
- Meter Sizes: 1″ (25 mm)
- Meter Body Materials: Aluminum, Nylon and PBT Polyester
- Fitting Connections: NPT and BSP
c. MODEL: FM-300 H/R
- Accuracy: +/- 2.0% of reading
- Flow Range GPM (L/min): 2-20 (7-75)
- Temperature: 15 to 130 deg F (-9 to 54 deg C)
- Pressure: 50 PSIG (3.4 Bar)
- Meter Sizes: 1″ (25 mm)
- Meter Body Materials: Aluminum, Nylon and PBT Polyester
- Fitting Connections: NPT and BSP
F. DP Series Insertion Impeller Meter
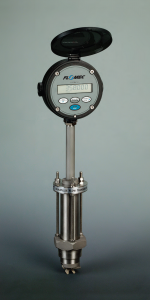
General Specifications:
- Accuracy: +/- 1.5% of reading
- Flow Range: 4.0 to 780,000 GPM (0.015 to 2940 m/min) Depending on pipe size
- Flow Velocity Range: 1 to 33 ft/s (0.3 to 10 m/s)
- Temperature: -40 to 300 deg F (-40 to 1500 deg C)
- Pressure: 1,200 PSI (80 Bar)
- Meter Sizes: 1-1/2″ to 100” (40 to 2500 mm)
- Meter Body Materials: Stainless Steel
G. QStar Ultrasonic Meter
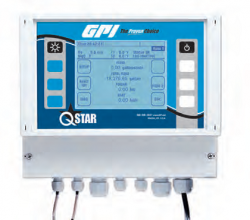
Specifications:
- Accuracy: Up to +/-1% of reading
- Flow Velocity Range: +/-98.42 t/sec (30 m/s)
- Operating Temperature: -4 to 140 deg F (-20 to 60 deg C)
- Transducer Temperature: -40 to 300 deg F (-40 to 150 deg C)
- Pipe Sizes: 1/2″ to 240” (10 to 6000 mm)
KATRONIC
Contactless flow measurement for the Water Supply & Wastewater Services Industry. Katronic’s ultrasonic flowmeters can be installed on existing and new pipes alike without the need to open them.
Advantages:
- Easy, quick and cost-effective installation on existing pipelines
- Applicable on pipes of various materials (incl. duplex stainless steel)
and diameters from 10 mm to 3,000 mm
- Fixed installed meters suitable for isolated locations without mains power supply due to low power consumption
- Maintenance free, very low MTBR (mean time between repairs)
- Easy integration into existing of future control systems
Fixed installed clamp-on ultrasonic flow meter
The KATflow 150 is for permanent flow metering applications. Its modularity offers comprehensive configuration options to make the instrument suitable for everything from simple water flow measurements to energy flow monitoring, automated process control and product recognition
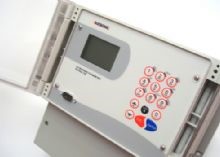
Features:
- For pure, clean, dirty and aerated liquids
- Bi-directional flow measurement
- Heat quantity measurement function (optional)
- Dual-channel flow measurement (optional)
- Meter diagnostic functions
- Incorporated bi-directional totalizer
- Data download via RS 232 or USB cable
- Real time data transfer possible
- Intuitive flow meter menu and Setup Wizard
General Specifications:
- Pipe diameters: 10 mm to over 3,000 mm (3 m)
- Temperatures: -30 °C to +200 °C
- Accuracy: ±0.5 % (velocity)
- Process outputs incl. Modbus and HART* (optional)
- Internal data logger for 100,000 measurements
- Unique Audible Sensor Positioning Assistant
Density / concentration measurement option
- Ex approved version available
GHM Messtechnik

A. Temperature handheld instruments
a. MODEL/SERIES: GMH 3710
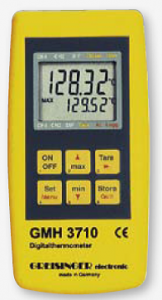
Pt100 – High-Precision Thermometer, Accessories not incl., 4-wire
• Suitable for all Pt100 4-wire probes with 4-pin miniature din-plug
• Highest accuracy and resolution (0.01 °C)
• Freely adjustable analog output 0 – 1 V or serial interface
• Offset and slope input, Min-/max- value memory, hold function
• incl. calibration protocol
Specifications:
Measuring range: -199.99 to +199.99 deg C resp. -200.0 to + 850.0 deg C
-199.99 to +199.99 deg F resp. -328.0 to +1562.0 deg F
Resolution: 0.01 deg C resp. 0.1 deg C; 0.01 deg F resp. 0.1 deg F
Linearisation: digital stored characteristic curve
Auto-range: automatically or manually choice of the measuring range
Accuracy: (±1 digit) (at nominal temperature = 25 deg C)
≤ 0.03 deg C / 0.06 deg F at resolution 0.01°
≤ 0.1 deg C / 0.2 deg F at resolution 0,1°
Temperature drift: ≤ 0.002 deg C / K
Probe / input: Pt100, 4-wire, in acc. to DIN EN 60751 probe connection via 4-pin miniature DIN-plug
Nominal temperature: 25 deg C
Working temperature: -25 to +50 deg C
Relative humidity: 0 to +95 % RH (non-condensing)
Storage temperature: -25 to +70 deg C
Display: two 4½ digit LCDs (12.4 mm or 7 mm high), as well as additional arrows.
Pushbuttons: 6 membrane keys
Output: 3-pin jack connector Ø 3.5 mm, choice between serial interface or analog output
- serial interface: direct connection to RS232 or USB interface of a PC via electrically isolated interface adapter GRS 3100 or GRS 3105 resp. USB 3100 N (p.r.t. accessories).
- analog output: 0 – 1 V, freely adjustable (resolution 13 bit, accuracy 0.05 % at nominal temperature)
Power supply: 9 V-battery, type IEC 6F22 (included) as well as additional d.c. connector for external 10.5-12 V voltage supply. (suitable power supply: GNG10/3000)
Low battery warning: bAt
Power consumption: approx. 1 mA
dimensions: 142 x 71 x 26 mm (H x W x D) Impact-resistant ABS plastic housing, membrane keyboard,
transparent panel. Front side IP65, integrated pop-up clip
Weight: approx. 155 g
Functional range:
Min./Max. value memory: Memorizing of max. and min. values.
Hold function: By pressing a button the current values will be „frozen“.
auto-Off-Function: 1 to 120 min (can also be deactivated).
Offset and slope input: Offset- and scale correction can be entered digitally.
b. GMH 3750

Pt100 – High-Precision Thermometer, Accessories not incl., 4-wire, Data logger
• Suitable for all Pt100 4-wire probes with 4-pin miniature din-plug
• Highest accuracy and resolution (0.01 °C)
• Freely adjustable analog output 0 – 1 V or serial interface
• Offset and slope input, Min-/max- value memory, hold function
• incl. calibration protocol
- 2 integrated logger functions
- Optical and acoustic min-/max- alarm
- userdefined sensor curve (50 interpolation points)te)
- real-time clock with day, month and year
Specifications:
Measuring range: -199.99 to +199.99 deg C resp. -200.0 to + 850.0 deg C
-199.99 to +199.99 deg F resp. -328.0 to +1562.0 deg F
Resolution: 0.01 deg C resp. 0.1 deg C; 0.01 deg F resp. 0.1 deg F
Linearisation: digital stored characteristic curve
GMH 3750 add. supports an user defined curve.
Auto-range: automatically or manually choice of the measuring range
Accuracy: (±1 digit) (at nominal temperature = 25 deg C)
≤ 0.03 deg C / 0.06 deg F at resolution 0.01°
≤ 0.1 deg C / 0.2 deg F at resolution 0,1°
Temperature drift: ≤ 0.002 deg C / K
Probe / input: Pt100, 4-wire, in acc. to DIN EN 60751 probe connection via 4-pin miniature DIN-plug
Nominal temperature: 25 deg C
Working temperature: -25 to +50 deg C
Relative humidity: 0 to +95 % RH (non-condensing)
Storage temperature: -25 to +70 deg C
Display: two 4½ digit LCDs (12.4 mm or 7 mm high), as well as additional arrows.
Pushbuttons: 6 membrane keys
Output: 3-pin jack connector Ø 3.5 mm, choice between serial interface or analog output
- serial interface: direct connection to RS232 or USB interface of a PC via electrically isolated interface adapter GRS 3100 or GRS 3105 resp. USB 3100 N (p.r.t. accessories).
- analog output: 0 – 1 V, freely adjustable (resolution 13 bit, accuracy 0.05 % at nominal temperature)
Power supply: 9 V-battery, type IEC 6F22 (included) as well as additional d.c. connector for external 10.5-12 V voltage supply. (suitable power supply: GNG10/3000)
Low battery warning: bAt
Power consumption: approx. 1 mA
dimensions: 142 x 71 x 26 mm (H x W x D) Impact-resistant ABS plastic housing, membrane keyboard,
transparent panel. Front side IP65, integrated pop-up clip
Weight: approx. 155 g
Functional range:
Min./Max. value memory: Memorizing of max. and min. values.
Hold function: By pressing a button the current values will be „frozen“.
auto-Off-Function: 1 to 120 min (can also be deactivated).
Offset and slope input: Offset- and scale correction can be entered digitally.
of the GMH 3750:
Additional functions of the GMH 3750:
Min-/Max-alarm:
the measuring value is constantly monitored if it remains within the min./max. limits (can also be deactivated).
– alarm:
3 different alarm settings
off: alarm function not activated
on: visual alarm via display, integrated buzzer and interface
no Sound: alarm via display and interface
- Controlling function:
with the help of the switching module GAM3000 (optionally) electric equipment can be switched on/off or get alarm monitored
Logger functions:
- manually: 99 data sets (data recall via keyboard or interface)
- cycle: 16.384 data sets (data recall via interface) adjustable cycle time: 1 s … 1 h
Logger start and stop via the keyboard or interface.
Comfortable read-out and display software (GSOFT3050) available as additional equipment.
real-time clock: clock with day, month and year
c. GMH 175
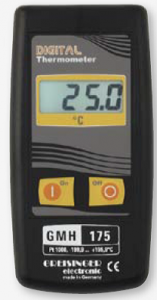
Precision Thermometer
Battery/mains operation, for plug-in probes, Pt1000 2-wire
Specifications:
Measuring range: -199.9 to +199.9 deg C
Resolution: 0.1 °C
Accuracy: (at nominal temperature = 25 deg C)
device: 0.1 deg C ± 1 digit (within range of: -70.0 to +199.9 deg C)
Probe: Pt1000 probe, 2-wire, probe connection via 3.5 mm Ø jack connector.
Probes not included – please order separately!
Display: 3½ digit, approx. 13 mm high
Working temperature: -30 to +45 deg C (low temperature – for use in cold storage rooms!)
Storage temperature: -30 to +70 deg C
Power supply: 9 V-Battery type IEC 6F22 (included) as well as additional d.c. connector
for external 10.5 – 12 V direct voltage supply. (suitable power supply: GNG10/3000)
Battery service life: approx. 200 operating hours
Low battery warning: „BAT“
dimensions: approx. 142 x 71 x 26 mm (H x W x D). impact resistant ABS plastic case, front side IP65, integrated pop-up clip for table top or suspended use.
Weight: approx. 160 g (incl. battery)
B. Flow
The electronic flow monitoring with calorimetric measuring method does not need any moving parts in the flow (i.e. no turbine wheel or float). Therefore this sensor can be also used with aggressive media. Continuously measurements of smallest quantities of – for example – flavorings, liquors, water, etc. or chemically aggressive media is the main application field of the flow-meter HFK35-FIN.
a. Flow measurement of smallest quantities (HFK35-FIN)
Advantages HFK35-FIN:
- Several tube dimensions (6, 8 and 10 mm) adequate squeeze or screw terminals
- Flow: 0,001..10 l/min
- Pressure range: -1..+10 bar
- Accuracy: +/-2 %
- Application:Monitoring and measuring of smallestflows, Leakage control
b. Calorimetric flow measurement (HFK)
Advantages of further HFK-sensors:
- Process connection: TriClamp or G .
- Flow velocity water: 0,1..3 m/s
- Several evaluation electronics
- Application: Controlling and measuring
c. Electromagnetic flow measurement (MFI)
The voltage inductively produced by a conductive liquid in a magnetic coil depends on the flow velocity. This correlation is used for electromagnetic flow measurement. Advantages of this method are that no moving parts are necessary, that it causes only little pressure loss and that the same probe can be used
for a wide range of tube diameters.
Advantages:
- Variable process connection
- 14 diameters 3..100 mm
- Power supply 24 V DC
- Extremely compact
- Rotary head
- Completely made of stainless steel
Application:
- Flow measurement for all conductive liquids and pastes
- Process monitoring and control
- Continuous process dosing
- Filling of receptacles
- Batch-wise processes
- Minimum conductivity ≥ 5 μS/cm
C. Level
a. Hydrostatic level measurement (SA11 / TA1010)
The level measurement is done by measuring the hydrostatic pressure. Pressure is created by the liquid column above the sensor and is directly proportional to the fill level. The results can be visualized or processed by means of evaluation electronics adapted to the sensor.
- Level measurement for any tank shape via pressure measurement
- High accuracy ≤ 0,5 %
- Differential pressure measurement via double pressure measurement and evaluation electronics
- Complete stainless steel version
- Protection class IP65 or IP68
- Suitable for tank linearization via TA1010 or TA9648 evaluation electronics (6 Tank geometries as well as selectable special tank shape
b. Capacitive level measurement (UNICON-CL)
- Measuring ranges 0..200 mm to 0..3000 mm
- Units (mm, cm, in, ft, yd, m) programmable
- PTFE-measuring rod with G .-connection thread
- Compact design in 2-wire technology
- Outputs: 2 x 4..20 mA (for level and temperature), electrically isolated 2 x transistor switching outputs
- Protection class IP65
- Accuracy 0,5 % }2 mm
- Constant temperatures up to 120 °C
Application:
- Liquid, conductive adhering media
c. Potentiometric level measurement (MLP)
The MLP series continuously measures the level of all flowable media with a 3-pole rod probe. Using electrostatic induction effects allowed us to move the reference pole into the probe. Therefore an electric connection is not necessary any more at the tank. This enlarges the field of application; i.e. measurements in glass or plastic tanks.
- Dynamic measuring of fill levels for as little as 5 cm up to more than 2 m
- Minimum conductivity ≥ 5 μS/cm
- Measuring method independent of overpressure
- Only one measuring rod for metal or plastic tanks
- Applicable for permanent ambient temperatures up to 130 °C
- Several process connections
- Rod lengths with millimeter precision
d. Weighing measurement (DMS50 …)
- Transmitter without contact to medium
- Strain gauge input / Ex approval
- Measuring range from 0..2 kg to 0..5000 kg, maximum 0..100 t
- Basic accuracy 0,02 % to 0,1 %
- Repeat accuracy ≤ 0,03 %
- Max. overload 150 % to 200 %
- Protection class IP40 to IP67
e. Electrical transmitter (DMS50)
- 1 or 2 effective directions
- Teach-in function
- Tare function
- Simulator function
- Unit selectable (kg, t, N, kN, Nm, bar)
- Min- / max- value memory
- LED- or LCD- display
- Basic accuracy < 0,1 % to < 0,025 %
- Modbus- / Profibus DP- connection
- Up to 4 alarm outputs
Application:
- Level measurement in complete tanks
- Control of batch processes
Centec

Centec is a privately owned group of companies. With a focus on the processing industries, we are rapidly growing in the major world markets. We have a global sales and service structure, with our own subsidiaries and a network of qualified distributors. Our international operations include mechanical, electrical and process automation engineering, with skid manufacture and pipework fabrication; as well as our own switch cabinet production. This infrastructure allows efficient logistics, short lead times and strict adherence to delivery deadlines. The quality of our products is excellent, so is the price-performance ratio.
OXYTRANS
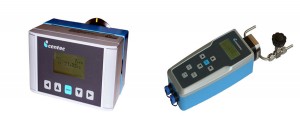
Application and Measurement Principle:
Boiler feed water is water used to supply (feed) a boiler to generate steam or hot water. The feed water must be specially treated to avoid problems in the boiler and downstream systems. Untreated boiler feed water can cause corrosion and fouling. Corrosive compounds, especially oxygen, must be removed by deaeration systems. OXYTRANS allows to measure and control O2 concentration with highest precision. Centec deaeration skids based on membrane and column technology are generally equipped with OXYTRANS for highly efficient process control.
An indicator layer on a small glass component (“optical window”) installed in the measuring head is illuminated with blue-green-light. When the indicator molecules absorb the incident light they are promoted to a higher energy state. After a certain time they convert back to their ground state during which a detectable red light is emitted. If O2 is present the energy is transferred from the indicator molecules to the oxygen. By detecting the red light, OXYTRANS determines the O2 content with highest precision.
